Equipment Booking
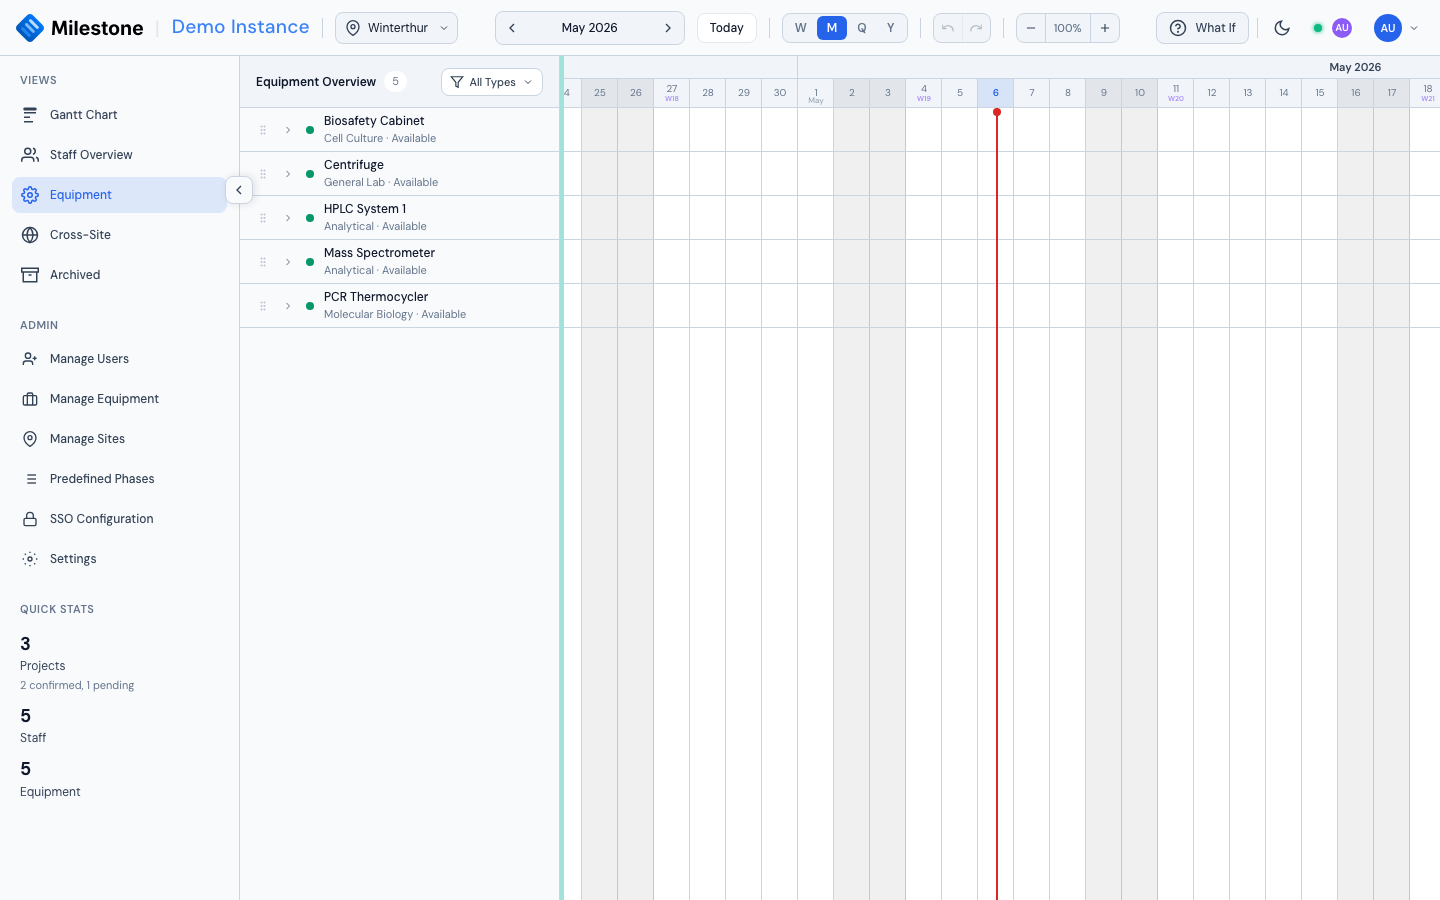
The Equipment View provides a timeline for tracking equipment availability and bookings across projects. It can be accessed from the sidebar or embedded below the main Gantt chart via the Panels toggle.
Tip
Admins, superusers and project managers can dock the Equipment view directly below the Gantt chart via the Panels button — see Resource Panels.
Equipment on Several Sites
Like staff, a piece of equipment can belong to several sites — a shared instrument is entered once and linked to every site that uses it. It then:
- appears in the Equipment view, the Equipment panel and the booking lists of each linked site;
- can be booked by projects on any of those sites;
- keeps a single set of maintenance blocks, which apply on every linked site.
Which sites an item belongs to is set in Settings → Equipment. Deleting a site only removes its link: equipment still linked to another site is kept, and only equipment left with no site at all is deleted.
Equipment List Panel
The left panel lists all equipment items for the selected site with:
- Status indicator: Green dot (available) or Red dot (currently booked)
- Equipment name: Primary identifier
- Type and status: Equipment type badge and "In use" / "Available" label
- Drag handle: Admins, Superusers and project managers can drag equipment onto the Gantt timeline to create bookings (a project manager only onto their own projects)
The panel is resizable — drag the divider between the panel and timeline (200px–500px).
Equipment Timeline
The right side shows a horizontal timeline with booking bars:
- Bars are color-coded by project for easy identification
- Multiple bookings can overlap on the same equipment, displayed as stacked bars
- Click any booking bar to edit the assignment (dates, equipment)
- Timeline zoom and date navigation sync with the main Gantt chart when embedded
Booking Equipment
Method 1: Drag & Drop
- Grab an equipment item by the drag handle in the Equipment panel
- Drag it onto a project or phase bar on the Gantt timeline
- A five-day booking is created where you drop it — click it afterwards to adjust the dates
Method 2: Context Menu
- Right-click on a project, phase, or subphase in the Gantt chart
- Select Assign Equipment
- The Equipment Assignment Modal opens
Assignment Modal
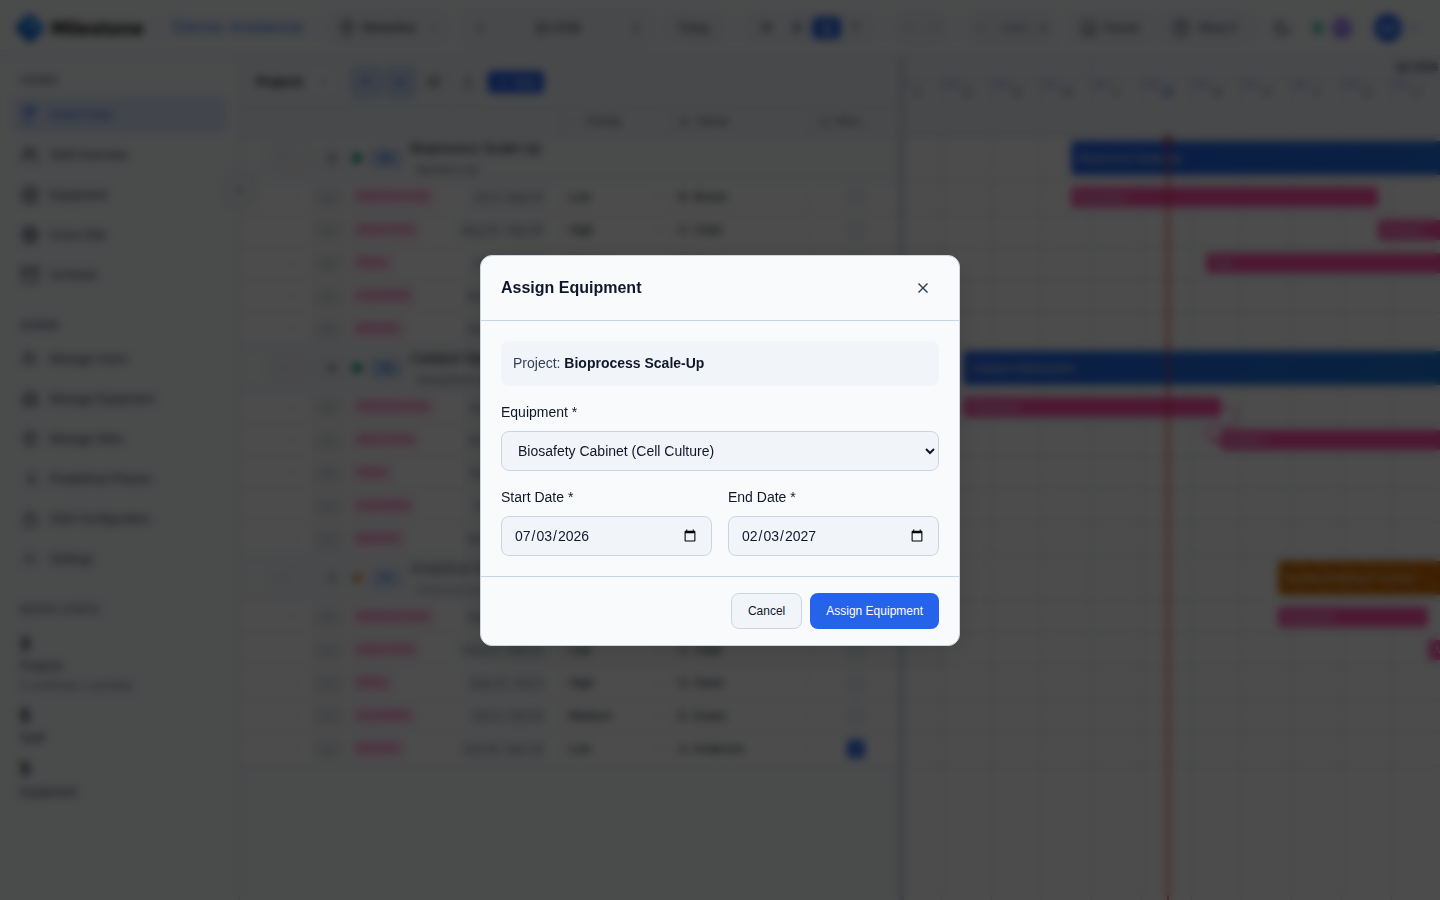
- Select the equipment item from a dropdown
- Set start and end dates for the booking
- Click Save to confirm
Filtering by Type
Click the filter button in the Equipment panel header to filter by equipment type:
- A dropdown shows all available types as checkboxes
- Check types to show (e.g., Analytical, Pilot Plant, Safety)
- Use Select All / Clear for quick selection
- The filter button shows the active count when filtering (e.g., "3 types")
Managing Equipment
Open Settings → Equipment from the sidebar's Settings entry (Admins and Superusers only).
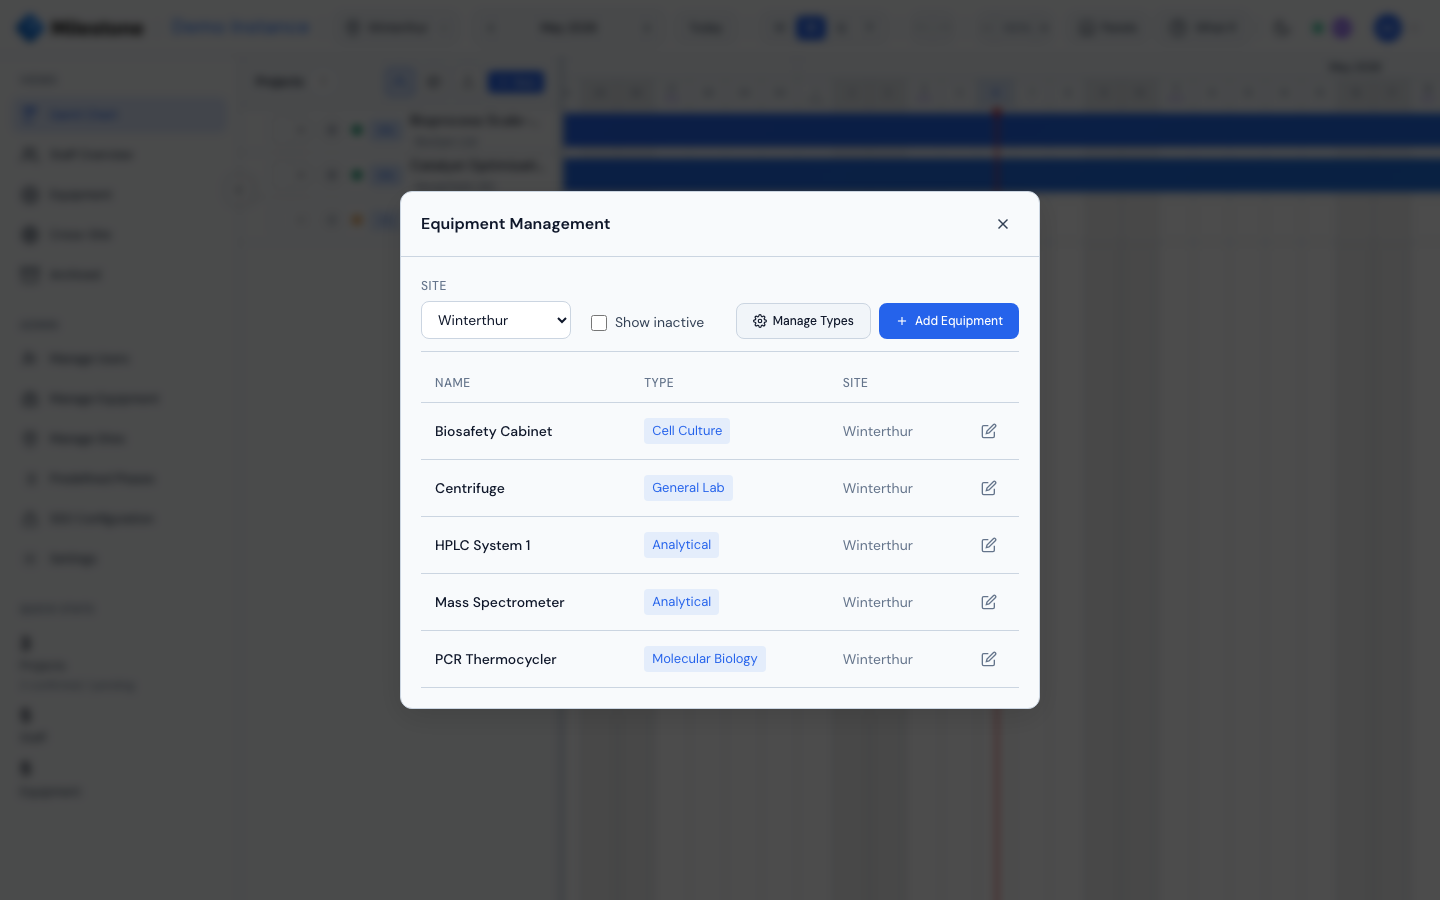
The list can be filtered by Site (or All Sites); an item linked to several sites shows them all, comma-separated, in the Sites column.
Adding Equipment
- Click Add Equipment
- Fill in:
- Name (required, e.g., "Pilot Plant A", "Mass Spec 1")
- Type — select an existing type or click + New type to create one inline
- Sites (required) — click every site where the equipment can be booked; at least one. The site you are filtering on (or viewing) is preselected
- Click Create Equipment
Editing Equipment
- Click the edit icon on an equipment row
- Modify the name, type, description, sites, or active status — adding or removing a site links or unlinks the item there
- Click Save Changes
Superusers and shared equipment
Superusers only see their own sites in the site picker, and can only edit or delete equipment whose sites are all sites they belong to. An item that is also linked to a site they don't manage shows a disabled edit icon ("Shared with sites you don't manage"); an admin, or a superuser of every linked site, has to change it.
Setting equipment to inactive removes it from booking lists and the Equipment View. Inactive equipment and their existing bookings are preserved.
Deleting Equipment
Click Delete Equipment in the edit form. A confirmation dialog warns that all assignments for the equipment will also be removed. This action is irreversible.
Equipment Types
Types are managed in Settings → Equipment types (or via the Manage Types button in the Equipment section). See Settings — Equipment Types for details on creating, renaming, and deleting types.
Maintenance Blocks
Equipment blocks mark a period when an item is unavailable for booking — typically due to maintenance, calibration, defect, or another planned outage. Blocks behave like vacations for equipment: they appear on the Equipment Timeline and are honoured by overlap detection so you don't accidentally schedule a project during a downtime window.
Creating a Block
- Right-click the equipment row (or an existing booking) on the Equipment Timeline and select Block Equipment, or open the Equipment panel and use the block action on the equipment item.
- The Equipment Block modal opens. Fill in:
- Equipment (required) — defaults to the row you clicked from
- Start date and End date (required, inclusive)
- Reason — Maintenance, Defect / Out of order, Calibration, or Other
- Description — short free-text label, prefilled from the chosen reason (e.g. "Annual recalibration")
- Click Save Block.
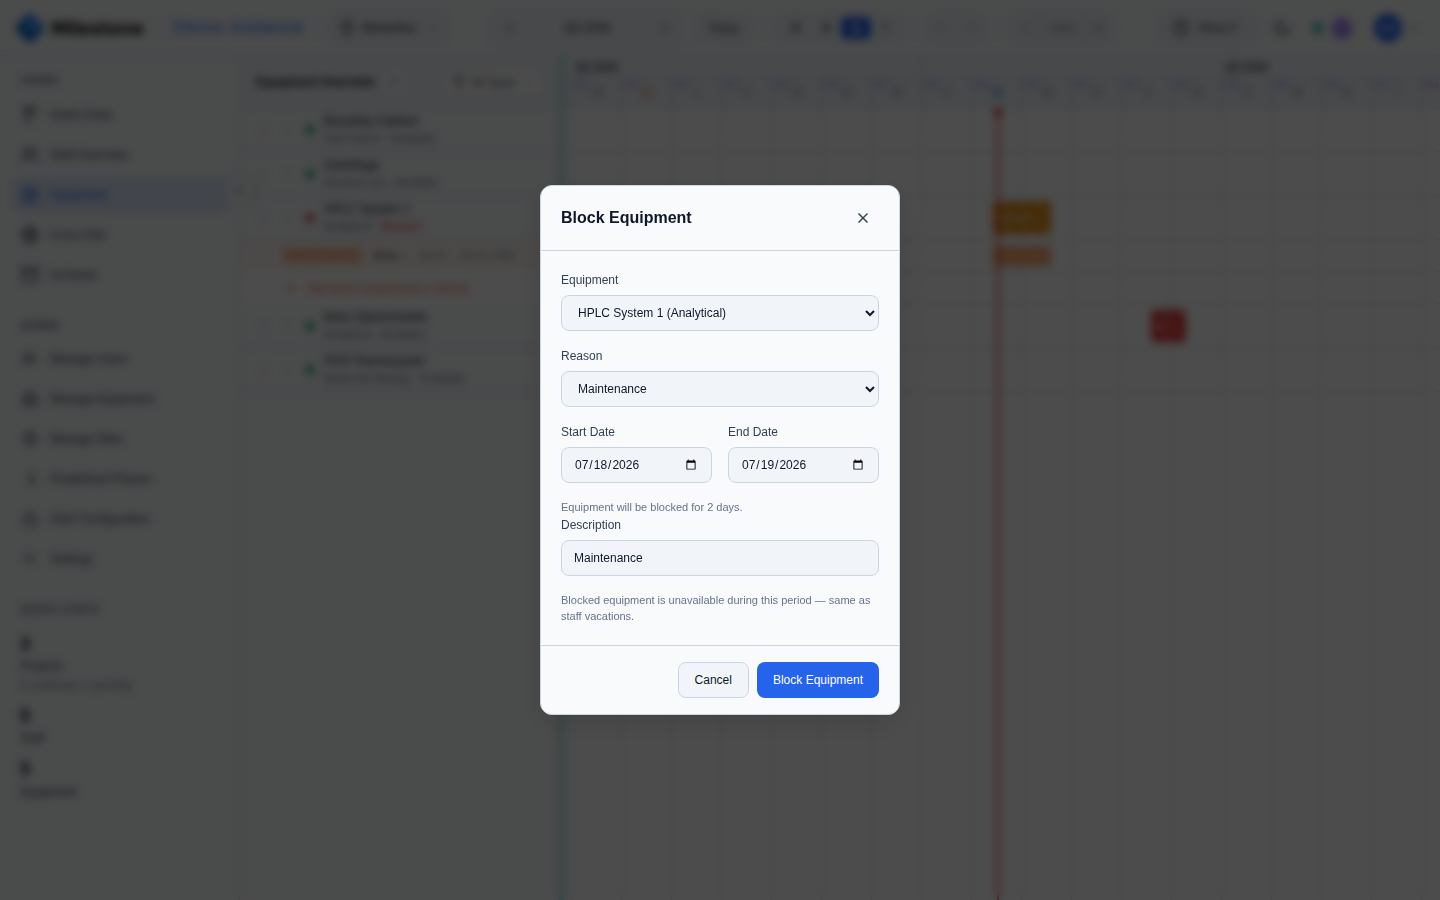
The duration is shown live as you change dates so you can confirm the window before saving.
Editing or Deleting a Block
- Click an existing block on the Equipment Timeline to open the modal in edit mode.
- Adjust dates, reason, or description and click Save Block.
- Click Delete Block to remove it. There is no soft-delete — the block disappears immediately and the equipment becomes bookable again on those dates.
How Blocks Affect Availability
- Block bars are styled distinctly from project bookings on the Equipment Timeline (typically a hatched or muted fill) so they're easy to distinguish.
- The equipment status indicator in the Equipment panel reflects the block — an item is shown as In use when its current date falls inside an active block, even with no project booking.
- When you create a new equipment assignment that overlaps a block, an overlap warning is shown (the assignment is still allowed — the warning is informational so you can resolve the conflict deliberately).
Permissions
Only Admins and Superusers can create, edit, or delete equipment blocks. Regular users see them on the timeline but cannot modify them. Superusers are limited to equipment whose sites are all sites they belong to.
A block (or booking) whose end date is before its start date is rejected. New blocks can't be added while What-If mode is active; existing blocks can still be edited and deleted there. Equipment itself cannot be deleted while a What-If plan is open, and What-If is entered from the Gantt chart only.
Permissions
| Action | Admin | Superuser | User |
|---|---|---|---|
| View equipment & bookings | Yes | Yes | Yes |
| Assign equipment to projects | Yes | Yes | Project manager of that project only |
| Add/edit/delete equipment | Yes | Yes (all of the item's sites must be their own) | No |
| Manage equipment types | Yes | Yes | No |
| Create/edit equipment blocks | Yes | Yes (all of the item's sites must be their own) | No |